Showing posts with label room makeover. Show all posts

Tuesday, 12 January 2016

Five ways to spruce up the outside of your house in a weekend


It's easy to forget about the front of your house. After all, it's inside your house that you spend most of the time. But here's the thing (and this is going to sound dead obvious I know, but it kind of dawned on me a while back) - the front of the house if the bit that EVERYONE sees. Sure your fam and friends and the occasional meter reader get to see what your house is like from the inside, but loads of people see it from the outside, so it's worth making it feel as nice as the inside, with a few little touches along the way that reflect you.

Since I had this realisation, we've done a few things to spruce up the outside of our house. There are a still a few on the list that we want to do, some of them those annoying, expensive-and-important, but not-actually-that-visually-different kid of jobs (the worst kind). The ones we've done so far tend to be more of the fun, minimum-effort, maximum-output kind of jobs (the best kind). So if you're thinking your front could do with perking up, here are five easy ways you can make a difference in a jiffy this weekend:

1. Paint the outside. Or just a bit of the outside, like we did recently when we got the front of our bay window painted in a nice neutral colour. As you can see from the before and after picture above, (the before of which was taken before we'd even moved in!) we had a few fussy light blue bits, and we wanted to 'clean' it all up a bit and it's made a huge difference.


2. Make up some window boxes. Like we did just the other day. You won't regret it. 


3. Change the numbers. So this is the thing I want to do next. I don't hate our house number at the moment, but I think it could do with a bit of an update now that the rest of the house has been spruced up a bit. These are my current faves, and there are more ideas on my pinterest board here, so watch this space.


4. Change your curtains. Net curtains don't have to be frumpy. I found our spotty ones in Ikea (where else?) and they look as nice from the outside as they do the inside. They don't make these ones anymore, but I found the two pairs above which I believe to be pretty lovely too. They get bonus points for helping visitors figure out which house on the street is yours - I'm always telling people we're the house with the spotty curtains.


5. Get a new front door. I want this more than I want any of the following: a new series of Spaced, 10 Whistles dresses, waking up every morning with really amazing eyebrows ready to go*.  That's big. You can see more front door porn romance in this post I wrote here


*Nah, actually I think I'd go for the eyebrows. But the front door is close.


Home Etc

Sunday, 18 October 2015

A sunny window: how we made our window boxes


I've talked before about my love of flowers, and this weekend we finally got round to making something that's been on the to do list for ages - window boxes for our front window. It was SO much fun, made me SO happy and looks so blimmin' ace that I implore anyone reading this to whip up a window box or two - it's guaranteed to make you smile very time you get home, and it's also been an instant mood lifter every time I look out of the window. The whole thing took less than an hour to do and was so easy I thought I'd share the joy - here's how it went:


STEP ONE: go shopping (aka the fun bit). First of all, we went to the garden centre to pick up some supplies - here's what we got (L-R): a 25l bag of compost, 4 x trays of 'bedding' flowers (each of these had six little pots in), 3 x window boxes, one long and two short, 20 x tulip bulbs, 1 x big bag of daffodil bulbs, and 3 x bigger cyclamen plants. The whole lot came to about £45 and we actually ended up with more than we could fit in our three boxes, which we used to fill a few extra flower pots of various sizes by our front door, so you could do this with less if you wanted. 


STEP TWO: drill a few holes. Our window boxes didn't have any holes in, so we used a drill to make some holes in the bottom to make sure the water could drain through. This was actually a lot of fun and I probably got a bit carried away and drilled a few more holes than were strictly needed.

STEP THREE: plant some bulbs. We wanted to make sure we'd always have something flowering all through the year, so we planted some bulbs underneath the surface to pop through in the spring when other things will have died down. We got a mixture of tulip and daffodil bulbs and planted them in a couple of inches of compost.


STEP FOUR: get some flowers in! We put one cyclamen in the middle of each box - we'd bought one that was a bit bigger than the other two, which went in the longer box.

STEP FIVE: fill the gaps. Then the bedding flowers went in either side to fill the gaps - we did this by eye and tried a few different combinations until it looked about right. My favourite of all the flowers we picked up were the ones below that look like big daisies with a hint of pink on the petals, and as these were quite tall, one went on either side of the cyclamen in the long window box, to add a bit of height either side. Each box had a trailing flower on each end, and then we used little bedding flowers to fill any gaps.


STEP SIX: put them in place and water like mad. Then came the fun bit - putting the boxes in place! We used some small wooden blocks to sit the pots on so they would drain, and then watered them. And watered them again. And then gave them another water for good measure. They basically need to be completely, ridiculously watered.

STEP SEVEN: admire your handiwork. FOR LIKE EVER, because you'll see them every day, and they're just going to get better and better as the flowers grow and fill out the gaps.

So that's it - super easy, and super fun too. As Alex is a landscape gardener, he gave me lots of tips along the way - here's what I learnt:
  • When it comes to flower arranging, visually it works to have an odd number of plants 
  • Things need a lot more watering than you think they do
  • You can't necessarily just buy all the flowers you think are prettiest, otherwise I'd have window boxes full of pink flowers and it would all look a bit 'matchy matchy'. After some persuasion from Alex, I realised that you need a mixture of colours, heights and types of flowers to look natural and set each other off 
  • Referring to compost as 'mud' in front of a landscape gardener, even if the first time was a genuine mistake, and the second was meant as a joke, will not go down well
  • Novelty watering cans, no matter how cute they seemed at the time, just AREN'T efficient pourers, as Arlo discovered during one of the many watering sessions...


Home Etc

Sunday, 4 October 2015

Two years of home


Timehop kindly reminded us of an anniversary today - it's two years since we picked up the keys on our first little house together. The 4th October is a date I'll always remember for that very reason, but this year it almost passed me by, so I was glad of the reminder. When we first moved in, I didn't write this little blog, so I didn't know about one of the most important things to do when it comes to diy: THE BEFORE PHOTO. I do love a good before photo - there's nothing like looking back at what a room used to look like to make you truly appreciate your efforts. IF ONLY I could go back in time two years today, I'd be snapping pics left right and centre in a way I'm pretty sure would annoy Alex (it usually does).

BUT looking back through an old file today I found the original estate agent details from the very first time we looked round. Well thumbed, I remember looking at the pictures over and over while we made the decision to put in an offer and waited for the months and months it took for it all to happen. So excuse the quality (because they're basically photos taken of a piece of paper) and behold - the before pictures! Orange walls and all. The 'before' shots are the ones on the left, and 'after' is on the right - did I need to say that?! I don't have corresponding 'after' shots of the exact same angles in each room (for the kitchen in particular, but I had to include because painting the white wall bright pink has made such a difference), there's LOADS of stuff still to do, but looking back on these shows me how far we've come. Here's to many more years in our happy home, many more diy efforts, and (if I've got anything to do with it) MANY more before and after photos to come.


Home Etc

Friday, 25 September 2015

My favourite corners #6 - our wobbly little mantel


I haven't done one of these 'my favourite corners' posts for a bit now, but while having an arrange of our mantelpiece today I realised it's one of my favourite little parts of the house. It's in our middle room, which I spose is technically the dining room but that feels like too grandiose a term for this room if I'm honest. Our middle room is the heart of the house really, seeing as all the best things happen in here, like (most) meals, nice cups of tea, and it also has the really comfy chair that I did all Arlo's feeding in when he was little, and is still my favourite place for a little sit down whenever I get the chance (seldom). Plus it's where the record player and radio are so that means most of the music and dancing happens in there too. So this is a busy room all in all.

This week I've added two new additions to the mantelpiece - these candlesticks which were a late birthday present from a friend. I wouldn't have bought these neccessarily but I'm so glad she did because now I've unpacked them and tried them in this room, I love them! I think the best presents are like that. They frame the big mirror above the fireplace just right, I love the colours and they also make me feel very grown-up to be the-kind-of-person-that-owns-actual-candlesticks. Plus she gets brownie points for choosing ones that are a) very hard to break, and b) very light if they fell on your head - I think these are as toddler proof as candlesticks get!

So they have a happy home on our wobbly mantelpiece alongside a collection of things that have all earnt their place over the last two years - the letters I bought as a moving in present to ourselves when we bought the house, the scented candle my friend gave out as her wedding favours, and a vintage radio, passed down in Alex's family and very precious, that takes pride of place. Each makes me smile for different reasons. In a house where most things need to be functional to suit the needs of a small and usually irrational person, it's nice to have a very little part that's for nothing else but looking at and smiling.


Home Etc

Sunday, 6 September 2015

10 ways to perk up a room for less than £25


I do love a bit of home improvement. Given that there's usually a two-year-old holding on to my leg/ blowing a recorder in my ear/ trying to clamber onto my back for a 'donkey ride' while braying, free time is pretty scarce around here, so anything that requires limited input for maximum visual impact is exactly the kind of DIY I'm after.

Since we moved into our first home two years ago, we've undertaken quite a few of these 'mini makeovers' - quick, easy, cheap changes you can make to really perk up your space. So if you're short on time, cash or just a little lazy when it comes to renovations (like me) then read on. All of these things we've done in our place, they all cost less than a Pony (that's £25. Yes I looked that up) and trust me, if I can do them, they're easy peasy.

one. Paint your tiles. 
This one's top of the list because we're actually right in the middle of doing it at the moment. A super quick and cheap way to make a big impact is to refresh your tiles with a quick coat of paint. Whether you're changing the colour, freshening it up or getting rid of some questionable tile designs that you have inherited (cough cough, that's exactly what happened to us) it couldn't be easier. We picked up a pot of white tile paint this weekend and set to work covering off the absolutely repugnant not to our taste nautical tiles that are scattered throughout our bath room - navy seahorse anyone? Two coats later and it feels so different - I just wish we'd done this two years ago! Ps. I have a whole board devoted to beautiful bathroom tile here, including this lovely example above, and some step-by-step guides for making beautiful patterned tiles using stencils, if you're feeling adventurous.
Actual cost: £20
Emotional wealth: immeasurable joy at being able to wave goodbye to the hideous sea creatures that you used to share your bathroom with.


two. Paint a wall a darker colour
I did this here with our gallery wall in the front room. I couldn't believe how much the subtle colour change made all the frames pop. 
Actual cost: £20 for a pot of paint BUT the very same paint we used above is currently on sale for a tenner, if you're interested.
Emotional wealth: a feature wall to be proud of. Bonus points for picking a wall shade that actually makes your complexion look better in the photos too.


three. Put up a mirror. Or three.
This one's good for dark rooms in particular. Our dining room is a bit of a gloomy space, so I've been keeping my eyes peeled at car boots and charity shops to find lovely old mirrors like the one about our 50s sideboard above. We have one on almost every wall in the room by now - it really helps reflect light, and the more you add the more light gets pinged around between them all.
Actual cost: all our mirrors have cost between £3-£8, from various charity shops and car boot sales - I've probs spent about £15 on them all in total
Emotional wealth: Genuinely the more light, the more perky you're going to feel, especially in the winter when dark days can bring an air of gloominess. Plus you'll able to check your hair do from any angle - always useful.


four. Fairylights anywhere everywhere.
Because what space can't be improved by a string of light fairy lights? None, that's what. Next!
Actual Cost: probs about a tenner, I think these above that I put up at crimble were more like £20 but they're super long
Emotional wealth: being able to deliver the right mood lighting for any occasion 


five. Paper the backs of your shelves 
This is such a good one. I remember discovering this little tip about ten years ago when I first moved into a flat share in London, doing it to a couple of Billy bookcases and flouncing around feeling like I was Linda Barker or something. So easy, so cheap, so transformative. Pick a colour or print you'd never want all over your walls, just to add a pop of colour. (Nb. picture can be found here)
Actual cost: about a fiver for some fancy wrapping paper (depending on the size of your shelves!) 
Emotional wealth: a sense of achievement and pride that can only come from having perfectly arranged shelving 


six. Give a door a lick of paint. 
wanged on quite a lot about this at the time, but when we painted our once-yellow/brown wooden doors in the spare room, and made them white instead, the difference was amazing - so much lighter and airier.
Actual cost: circa £20 for some white gloss
Emotional cost: the intense relief felt at getting rid of yellow pine 


seven. Buy a new shower curtain. 
Add a flash of colour. We recently picked up this one super cheap and it's honestly changed the whole bathroom. Ikea actually has loads of nice ones at the moment, like the above, a snip at a fiver, which also caught my eye. 
Actual cost: £6
Emotional wealth: having a bathroom that your 3-year-old nephew describes as "magical" when he goes in for a wee (true story)


eight. Change up the lighting.
Our middle room is one we've actually done very little to, but one of the things that's made the most impact is changing the light fitting. Before it was a weird metal fitting with three lightbulbs on little entwined branches, that sat very high up and close to the ceiling. It wasn't exactly our first choice. We picked up this fitting from Ikea (where else? I love that place) and although when it first went up I thought we'd made a huge mistake because it was just so big, I now love it. It's like it's balanced out all the white in the top half of the room, does that sound weird? It also gives so much light to what it usually quite a gloomy room, plus draws focus in to the table as the heart of the space. Nb. the pic above was actually snapped to show Arlo's new dinosaur balloon he got at Cowes Week, but it showed the light fitting pretty well so I thought it worked. Just felt I needed to acknowledge the dino in the room. 
Actual cost: £22
Emotional wealth: being able to see things properly - like when your house gets invaded by a Tyrannosaurus Rex.


nine. Buy a side table.
May sound weird, but this little table we bought from a second hand shop (with an amazing back story) is actually a super useful - it gives us extra storage and we've created a feature out of it in the dining room. We've tried it in a few places around the house, and it works in lots of spots - for the space it takes up, it adds a whole lot to the room.
Actual cost: £25
Emotional wealth: more storage = more things to love 


ten. Flowers FTW.
The easiest way to perk up a room (and myself!) for me has always been to splash out on some fresh flowers. 
Actual cost: well, about a fiver, although I just picked up a beaut bunch of twelve pink roses from M&S for two quid which him itself is giving me more joy than the flowers probably ever could. 
Emotional wealth: The addition of colour, a lovely smell, a bit of greenery and a whole lot of smiles to any room. 


So there you have it - none of them are exactly rocket surgery (or brain science!) but each has made a real impact on our home since we moved in, and ticks the holy trinity of home improvements for me; quick, simple, cheap. What could be better? I would LOVE to hear yours and add them to the list! 


Home Etc

Wednesday, 29 July 2015

Revisiting our Spring DIY to do list


I wanted to revisit this post with our 'to do' list of things we want to do around the house because SOME OF THESE THINGS HAVE ACTUALLY HAPPENED. I'm just as surprised as you are. I find my enthusiasm for doing house stuff comes and goes, but I'm in the zone at the moment and trying to make the most of it by getting some of those annoying little jobs done.

So here's what we can cross off the list so far:
  • Get round to painting the alcove in the front room that isn't the same colour as all the other walls (can you spot it!?)  Done! Painted this at the same time as this happened.
  • Arlo's bedroom door has had a coat of primer on it for months now. It just needs to be painted. I really want to do it because I've got his name sign all ready to go on it. It just seems like such a boring task. Must make myself do this. Really happy to have this one ticked off the list - you can see visual proof here
  • Get the spare room painted so you don't see the edges of where we removed the wall at the end of last year. This is the room we've actually done the most to since we moved in - walls knocked down, upstairs loo removed, carpet removed, floorboards sanded and painted. It's getting there! This has happened and it's soooo beautiful. More pics of this to follow soon no doubt.
  • Finish the patio - finally. We're so close
  • Sort out the rest of the garden so it matches the beauty of the patio. painted fences and walls, flowers everywhere, grow something we can eat - some herbs AT LEAST
  • Paint the bathroom. I've already done it once since we moved, but it was a bad impulse colour choice. I'll never be sharing pics of the bathroom unless they're the 'before' images to illustrate how much it's changed and is newly-beautiful because it would be too distressing for you all to witness it in its current state.
  • Do SOMETHING to the front garden. Lick of paint on the front of the house. Some plants. I like the idea of window boxes too. Just something!
  • Pipe Dream #1: some fantastic wallpaper in the bedroom. Inspiration here
  • Pipe Dream #2: new tiles on the kitchen floor. Been pinning pics like a mad woman while dreaming about this. Further inspiration here.

So three important things ticked off, which I'm proud off - not too worried about the pipe dreams happening any time soon (or ever?!?) and actually a lot has been happening in the garden lately. Enough to make me tempted to break those particular tasks down into mini tasks, so I can add them back on to the list just for the satisfaction of ticking them off again (I have been assured that I'm not the only person who does this).

So that feels like good progress with the Spring 'to do' list, and now it's well and truly Summer I'm shifting focus from indoors to outdoors from now on, to try and get the garden looking as lovely as it can before the summer ends and we're back round to winter again (I'm sincerely hoping that hasn't already happened). It's pretty much our favourite place to be at the moment and I hope to spend many more sunny days out there, listening to Arlo playing the xylophone from inside his little play tent. Yay for progress!


Home Etc

Sunday, 19 July 2015

Pretty in print


I like to try and bring back a memento from each holiday we go on - it's not always particularly linked to the trip itself, but just something bought at the time, that I always remember it by. For example, on one pre-baby city-break to Bath, we bought back a butter dish. In Corfu, it was a pot stand. No correlation to the nature of the trip, just things we liked at the time. 

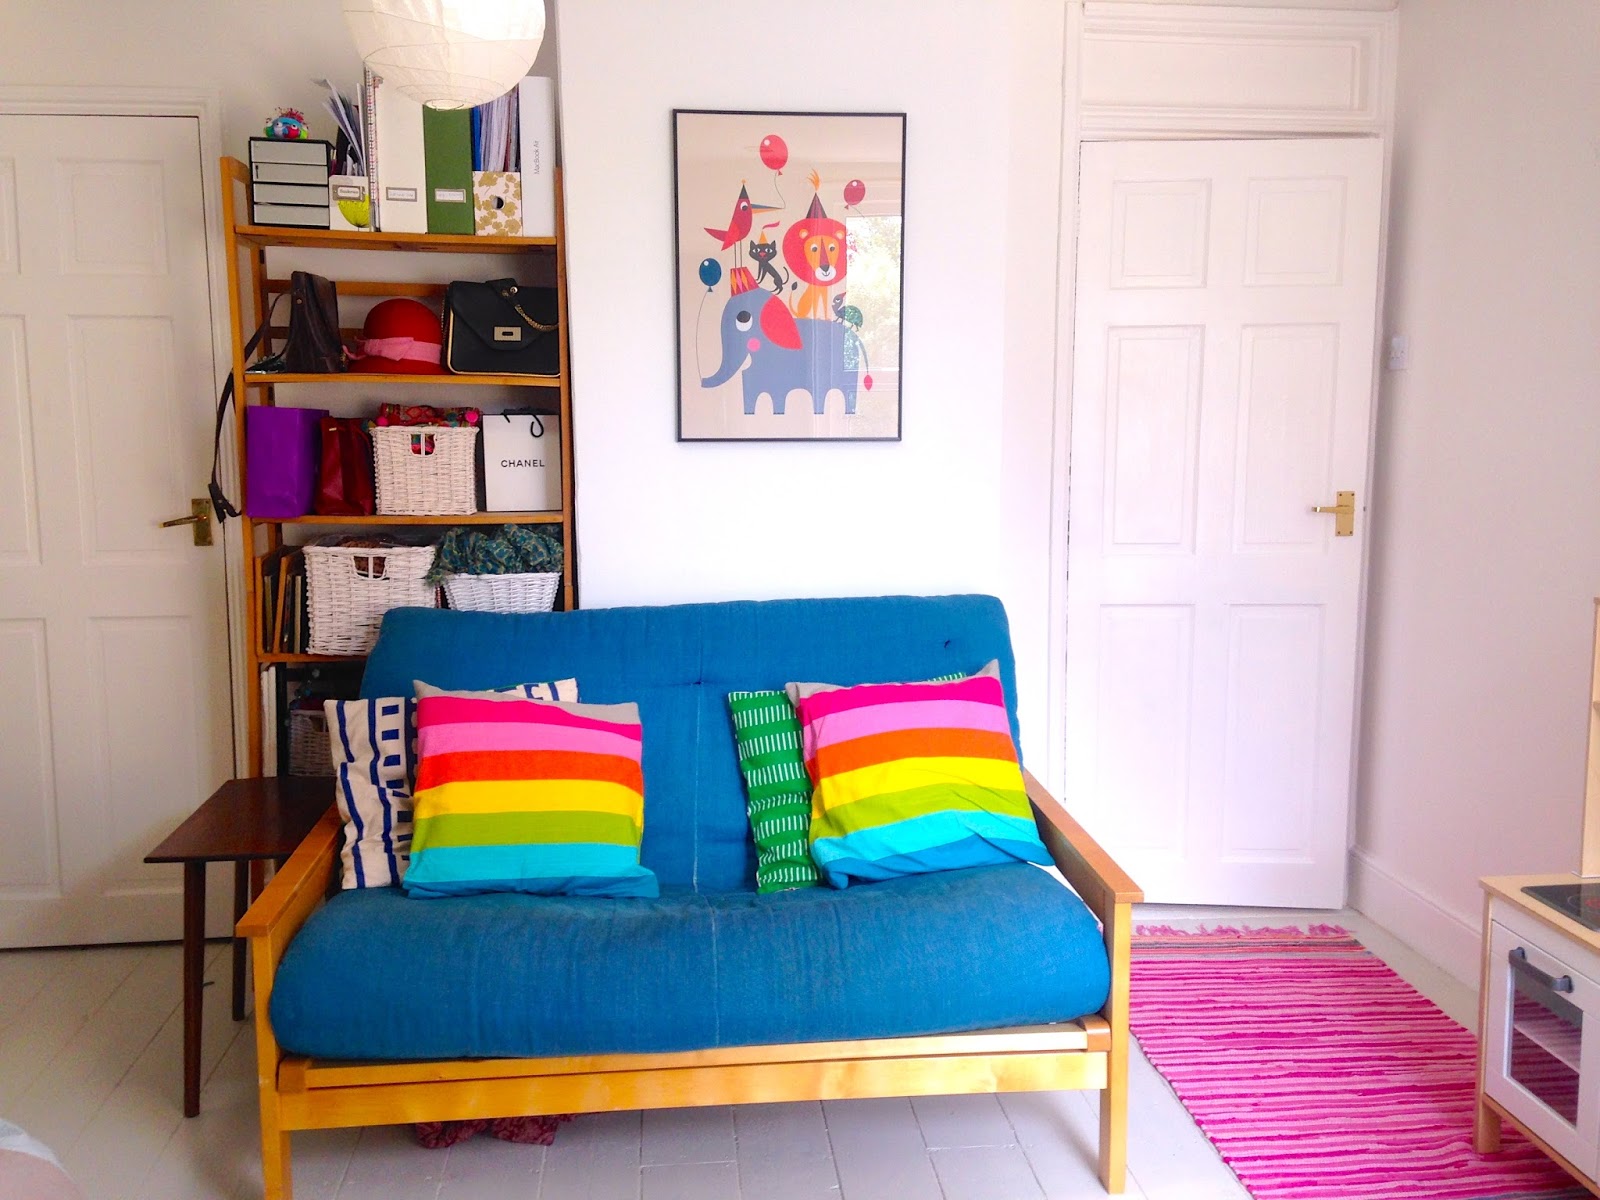
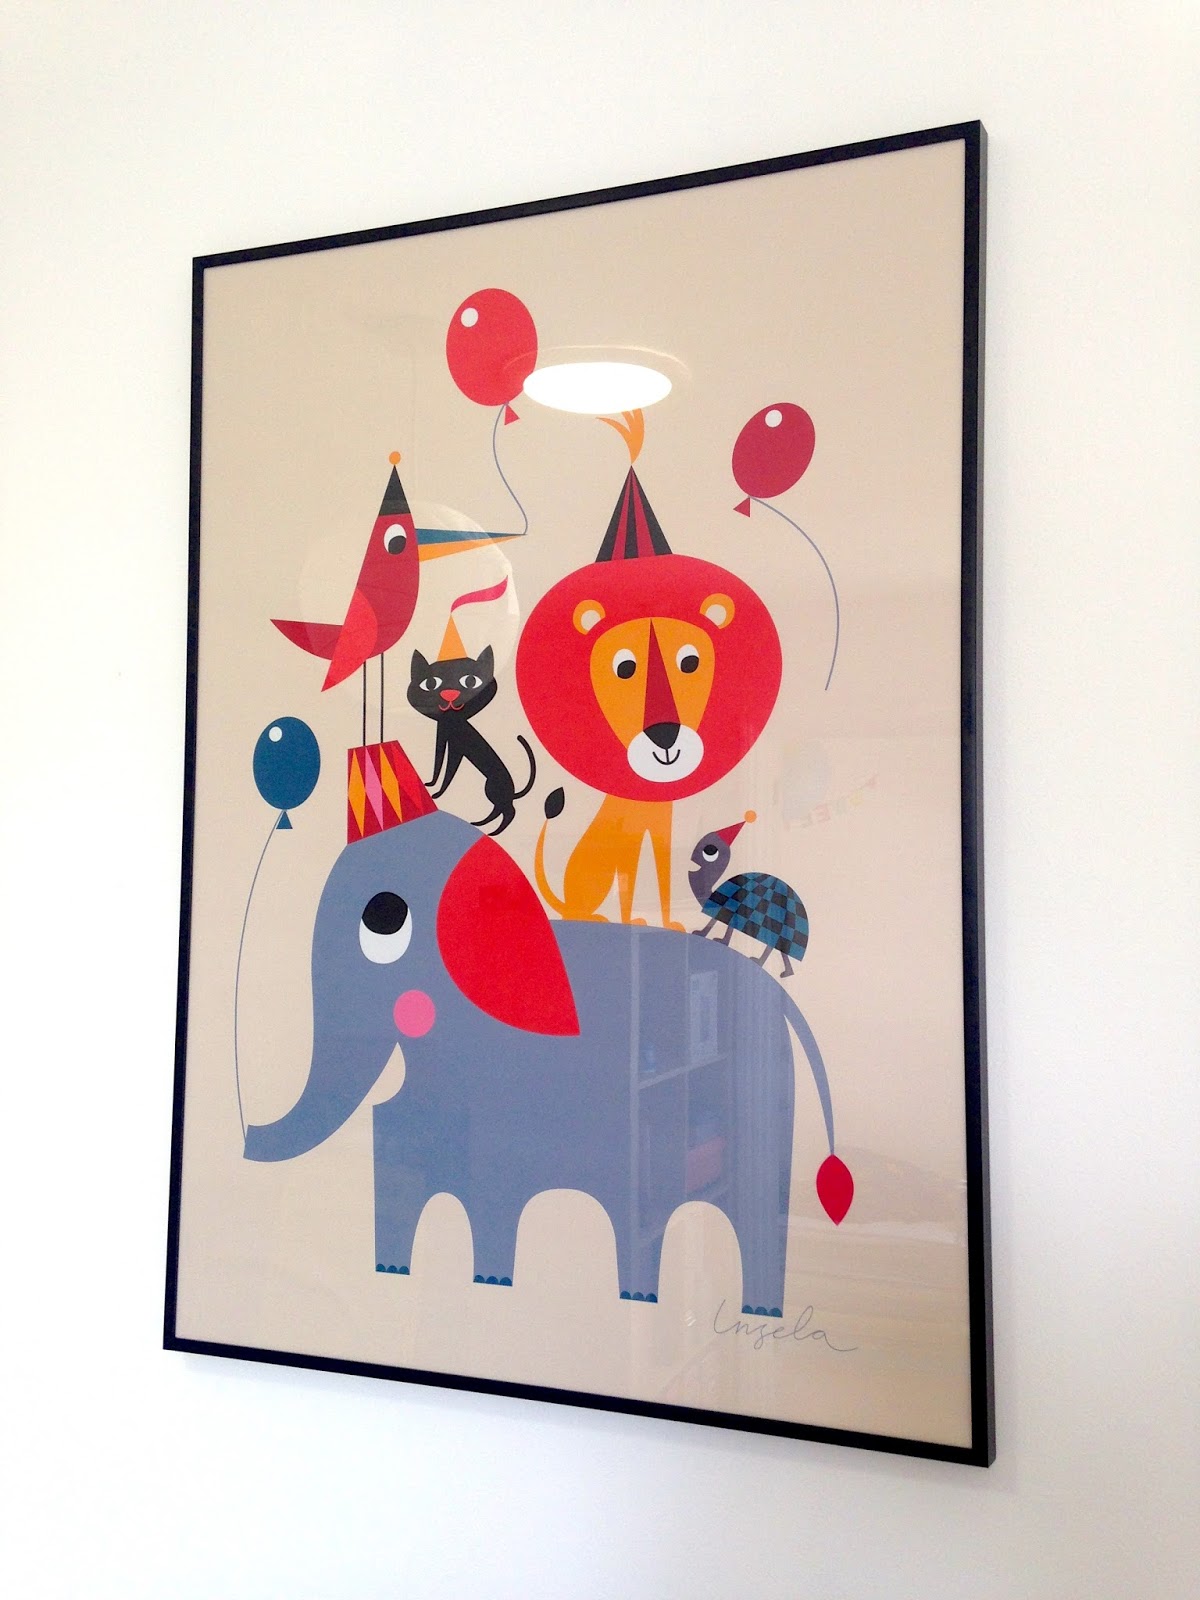
So when we went on our first family holiday last month, I wanted to bring something back and actually, Arlo chose this one, which makes it even more special. In The Hambledon, aka my favourite shop, aka shopping heaven (you can hear me wang on even more about why I love the place so much here) Arlo woke up just at the end of our visit to point this print out to me. It has a raa raa (lion) sitting on an oo-ee (elephant), so it ticked all his boxes, and he spent the next ten minutes doing his elephant impression in appreciation. It's also covered in balloons which seemed fitting seeing as it was the day after his second birthday. He loved it, and so did we, so we took it home, framed it (Ikea do the perfect fine frame that is the ideal match) and here it is - hanging in pride of place in the spare room, which since its spruce up was looking quite bare and in need of some wall adornments (you can never have too many frames in my book).

You can also see it from Arlo's bedroom when you look out the door, so I like the fact that it's the first thing he sees when he wakes up in the morning and wanders through to our room to wake us up. This is now a thing, because he's now tall enough to reach the door handle and escape let himself out of his room when he wakes up in the morning. While there are plus points to this (e.g. I don't have to actually get out of bed to go and get him when he wakes up now, I can just squeeze him in with us and try and eek out a few more moments of sleep in the morning) it's been happening daily at 5am, which is a minus point that kind of out-weighs anything else. More sleep please.


Home Etc

Sunday, 14 June 2015

What a difference a door makes


So we've finally made a start on our Spring diy to-do list and sorted out the spare room. After we got the wall taken down up there (SIX months ago!!) the room was useable, but not so nice to hang out in. There were big holes in the ceiling and wall where the partition wall had been that needed to be re-plastered and the whole thing needed a coat of paint to freshen it up. It had also, in the grand tradition of rooms that are 'spare', become a bit of a dumping ground for all our crap things that had no official home. We've since had the walls plastered and painted, which looks great, but the thing that has made SUCH a difference is painting the doors.

There are three doors in our spare room, so there's quite a bit going on. One leads to Arlo's room because you have to go through the spare room to get to his, the other is a cupboard and then there's the door you use to get into it in the first place (obvs). Previously all three of these doors had been bog standard, unvarnished yellow-y pine. Pretty gross. So we've had them all painted white to match the room, and it's such a transformation!

The above is the door that leads to Arlo's room, before and after. I hadn't realised before how much a dark door can suck the light out of the room - now that all the doors and woodwork are white like the walls, the whole place seems lovely and light and airy. *grabs paintbrush and manically starts painting all doors in sight*

I bought the letters on the door for Arlo the first time I ventured out of the house for a walk to the shops after he was born - I fell in love with them. Turns out they feature three of his favourite animals ever that spell out his name (Alligator, Rabbit, Lion. He's not sure about Owls). I've been waiting to put them up on his bedroom door ever since he had a bedroom. It's taken a while but it was worth the wait.


ps. more pics of the finished spare room to follow too, it's just not actually quite finished yet. Bear with.


Home Etc

Friday, 22 May 2015

If tables could talk


Sometimes, you see something in a shop and you know instantly that it's meant for you. This used to happen to me with dresses, but these days it happens mostly with furniture. Which is a shame because our house is already full of furniture. So these days when it happens, and I spot something that I love and know would look ace in our house, as well as being useful, I have a little internal monologue that goes something like:

Me: "Oh this is so gorgeous, I'm just going to get it"
Sensible me: "And put it where though?"
Me: "I dunno, I'm sure there's a perfect spot for it, but in the meantime I just couldn't possibly leave this gem here in the shop, so like I said previously, I'm just going to get it"
Sensible me: "Stop being a dick. Gaaaad."

Quite often you can replace Sensible Me with Alex in this conversation, as he's usually the voice of reason in these types of scenarios.

SO ANYWAY, back to this weekend - I spotted this little gem in a tiny shop that I'd never noticed before. It was right by the door and caught my eye straight away because it was right up my street. I went in to have a look and the shop keeper told me that it was hers, but she was reluctantly selling lots of her furniture because she's emigrating to Australia next month. She also told me that this little side table had the most amazing back-story - it was designed and made by a prisoner on the Island (we have several prisons here because being surrounded by water on all sides makes it more difficult to escape. Except that means that when a prisoner does escape, which ACTUALLY HAPPENED when I was about nine years old, it makes it very likely that he stays on the island, prowling around and hiding in people's sheds, etc. Which means everyone is too scared to go in their shed, or even garden, until they're found. TERRIFYING.)

SO ANYWAY, back to the prisoner - he made the table by hand as a wedding present for his warden, to say thank-you for turning his life around. The lady in the shop had bought it from the warden's daughter in a garden sale when he went into a home. It's really beautifully made, so much time and craft has gone into it.

So it's a beautiful thing, with an amazing story, and a price tag that frankly would have been quadrupled if we were in London.


So basically, I fell in love with it, but thought Alex would out his sensible hat on and remind me (not incorrectly) that we don't need any more furniture. So imagine my joy when I showed him and he loved it too! We bought it then and there and took it home on the back seat of the car. I'm just so chuffed with it. So far, we've tried it in the front room, just by the front door when you get in, and by the dining room table for storing the table mats etc. Neither feels quite right, but it does look good wherever we put it. So even though it currently has nothing in it, and no long-term home, it's definitely a keeper and I know we have the perfect spot for it somewhere, we just need to find it.


ps. Sorry for all the caps lock, this kind of thing makes me over-excited


Home Etc

Monday, 4 May 2015

My favourite corners #4 - gallery wall before and after


This post started out as a bit of a 'before and after' but then I realised that our gallery wall is definitely one of my favourite parts of the house, so I've continued my series of My Favourite Corners with this lovely lovely wall.

This weekend I had a revelation. I always thought that when it came to walls, bright white is best. It's light, it's airy, it's clean and it goes with everything, hence most walls in our home are white. This wall in our front room is one of the biggest, most 'free' walls in the house, because it doesn't have any furniture on it, and I decided pretty early on that this would make a brilliant gallery wall, seeing as it would be bloody boring round here if we left it all blank for too long. As you can see, it's not particularly neat or precise, but it's a growing collection of different frames, each housing a little memory of ours, and I like the 'higgledy piggledy' feel. Precise this home is not.

I've been looking at our gallery wall almost every evening for the last year and a half (it's right opposite the sofa after all) and something about it hasn't been feeling quite right. The wall's getting a bit smudgy and dirty, the pictures were looking a bit flat and 'meh' - I was getting bored. So I decided a change was in order. I took all the frames down, one by one, and painted the wall underneath grey. And what a bloody difference some grey makes! The frames all look SO much better against a darker shade, the colours really pop and the pictures stand out more. Even our toy trolley looks better against the grey wall (pictorial evidence above). I'm so mad about it, I've been spending quite some time this weekend just gazing out at it and swooning. Lesson learned: sometimes a darker background shade just makes everything else in the room look brighter by association. 

If you're a fan of corners (and who isn't?) you can see some other Favourite Corners from the series here and here, although I can't guarantee they won't all have been painted grey by the time you read this. 


Home Etc